Cloud Pro
Cloud Enterprise
- Browse and understand your data models
- Find relevant metrics and dimensions
- Switch between different projects seamlessly
- Respect your data governance and access controls
MCP respects all your existing Lightdash permissions and user attributes. MCP
clients can only access the data that your user account has permission to
view.
Get started
Setting up MCP is quick and straightforward. You can connect your AI assistant to your Lightdash instance in just a few minutes.Prerequisites
- A Lightdash Cloud Pro or Enterprise account with MCP enabled
- An MCP-compatible AI assistant (e.g., Claude.ai, Claude Desktop, ChatGPT)
Installation
Claude.ai (Web & Desktop Apps)
Set up MCP in the Claude.ai web app, and it will automatically sync to your Claude Desktop app after restart.Setup instructions
Setup instructions
-
Access Settings in Claude.ai
Navigate to your profile menu (bottom-left corner) and select Settings.

-
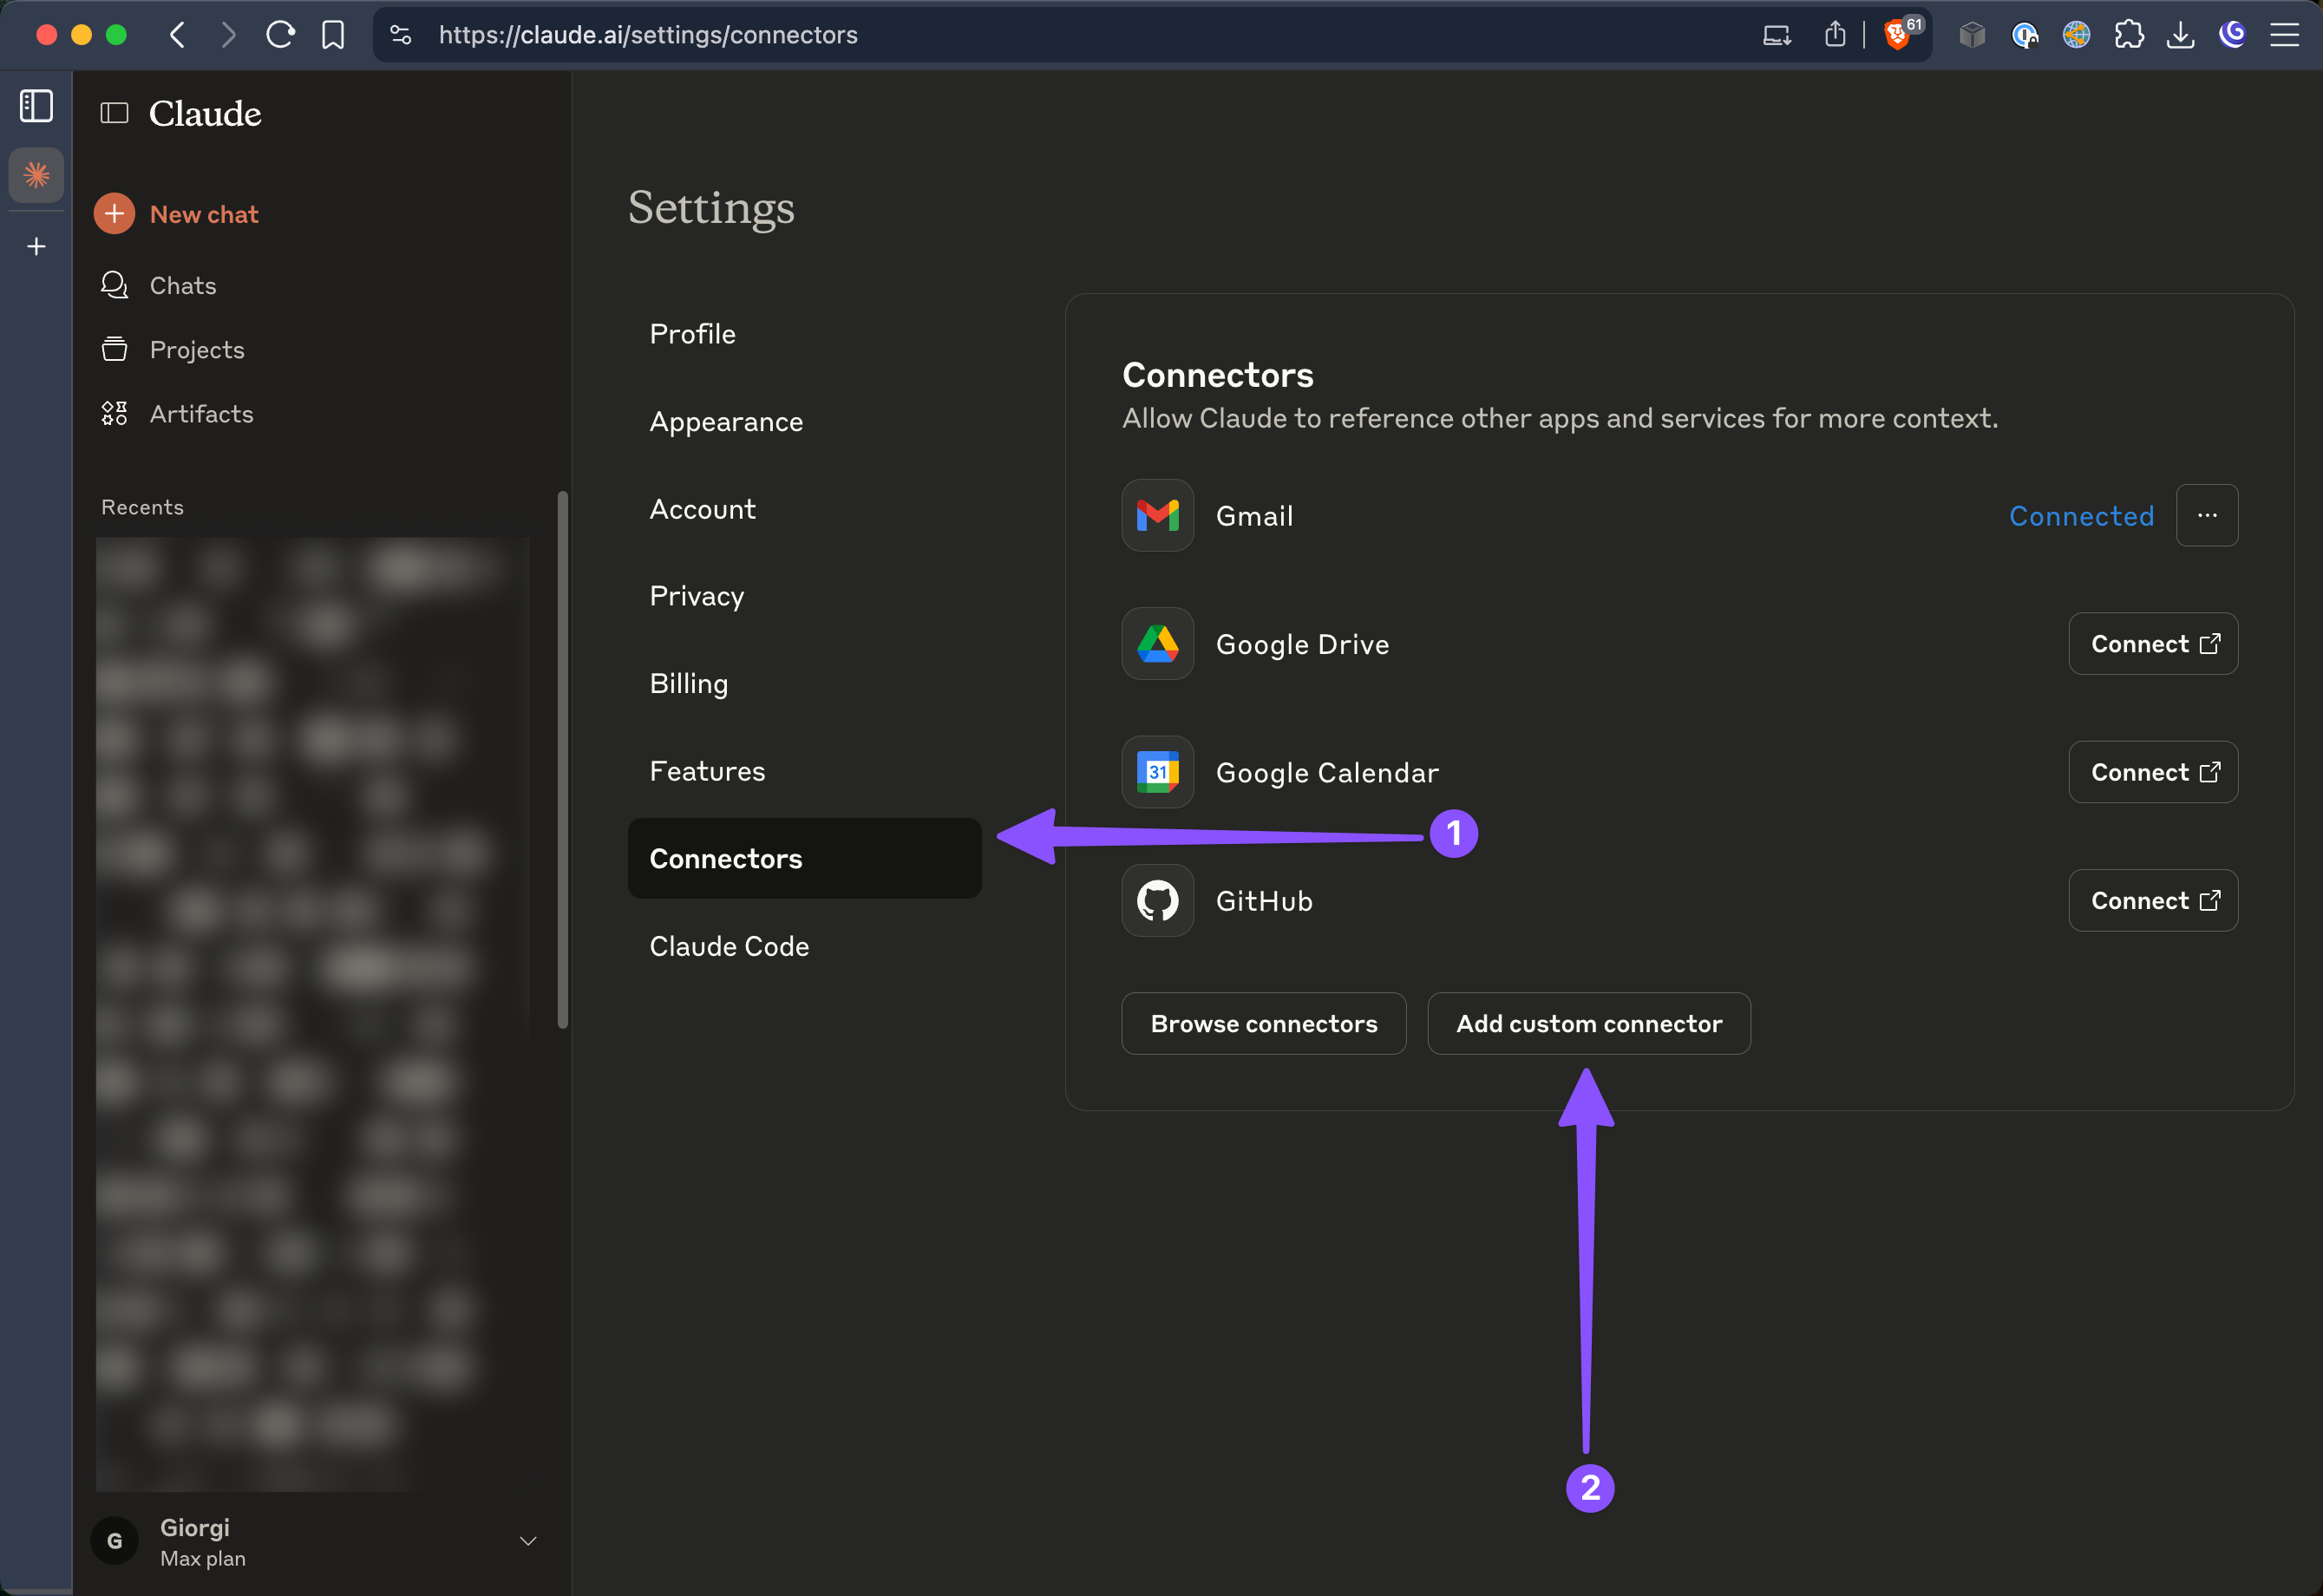
Add Custom Connector
In the Settings menu, select “Connectors” from the sidebar, then click “Add custom connector”.
-
Configure Connection
Fill in the connection details with your Lightdash instance information.

- Name: Lightdash (or any name you prefer)
- URL:
https://<your_instance_name>.lightdash.cloud/api/v1/mcp
-
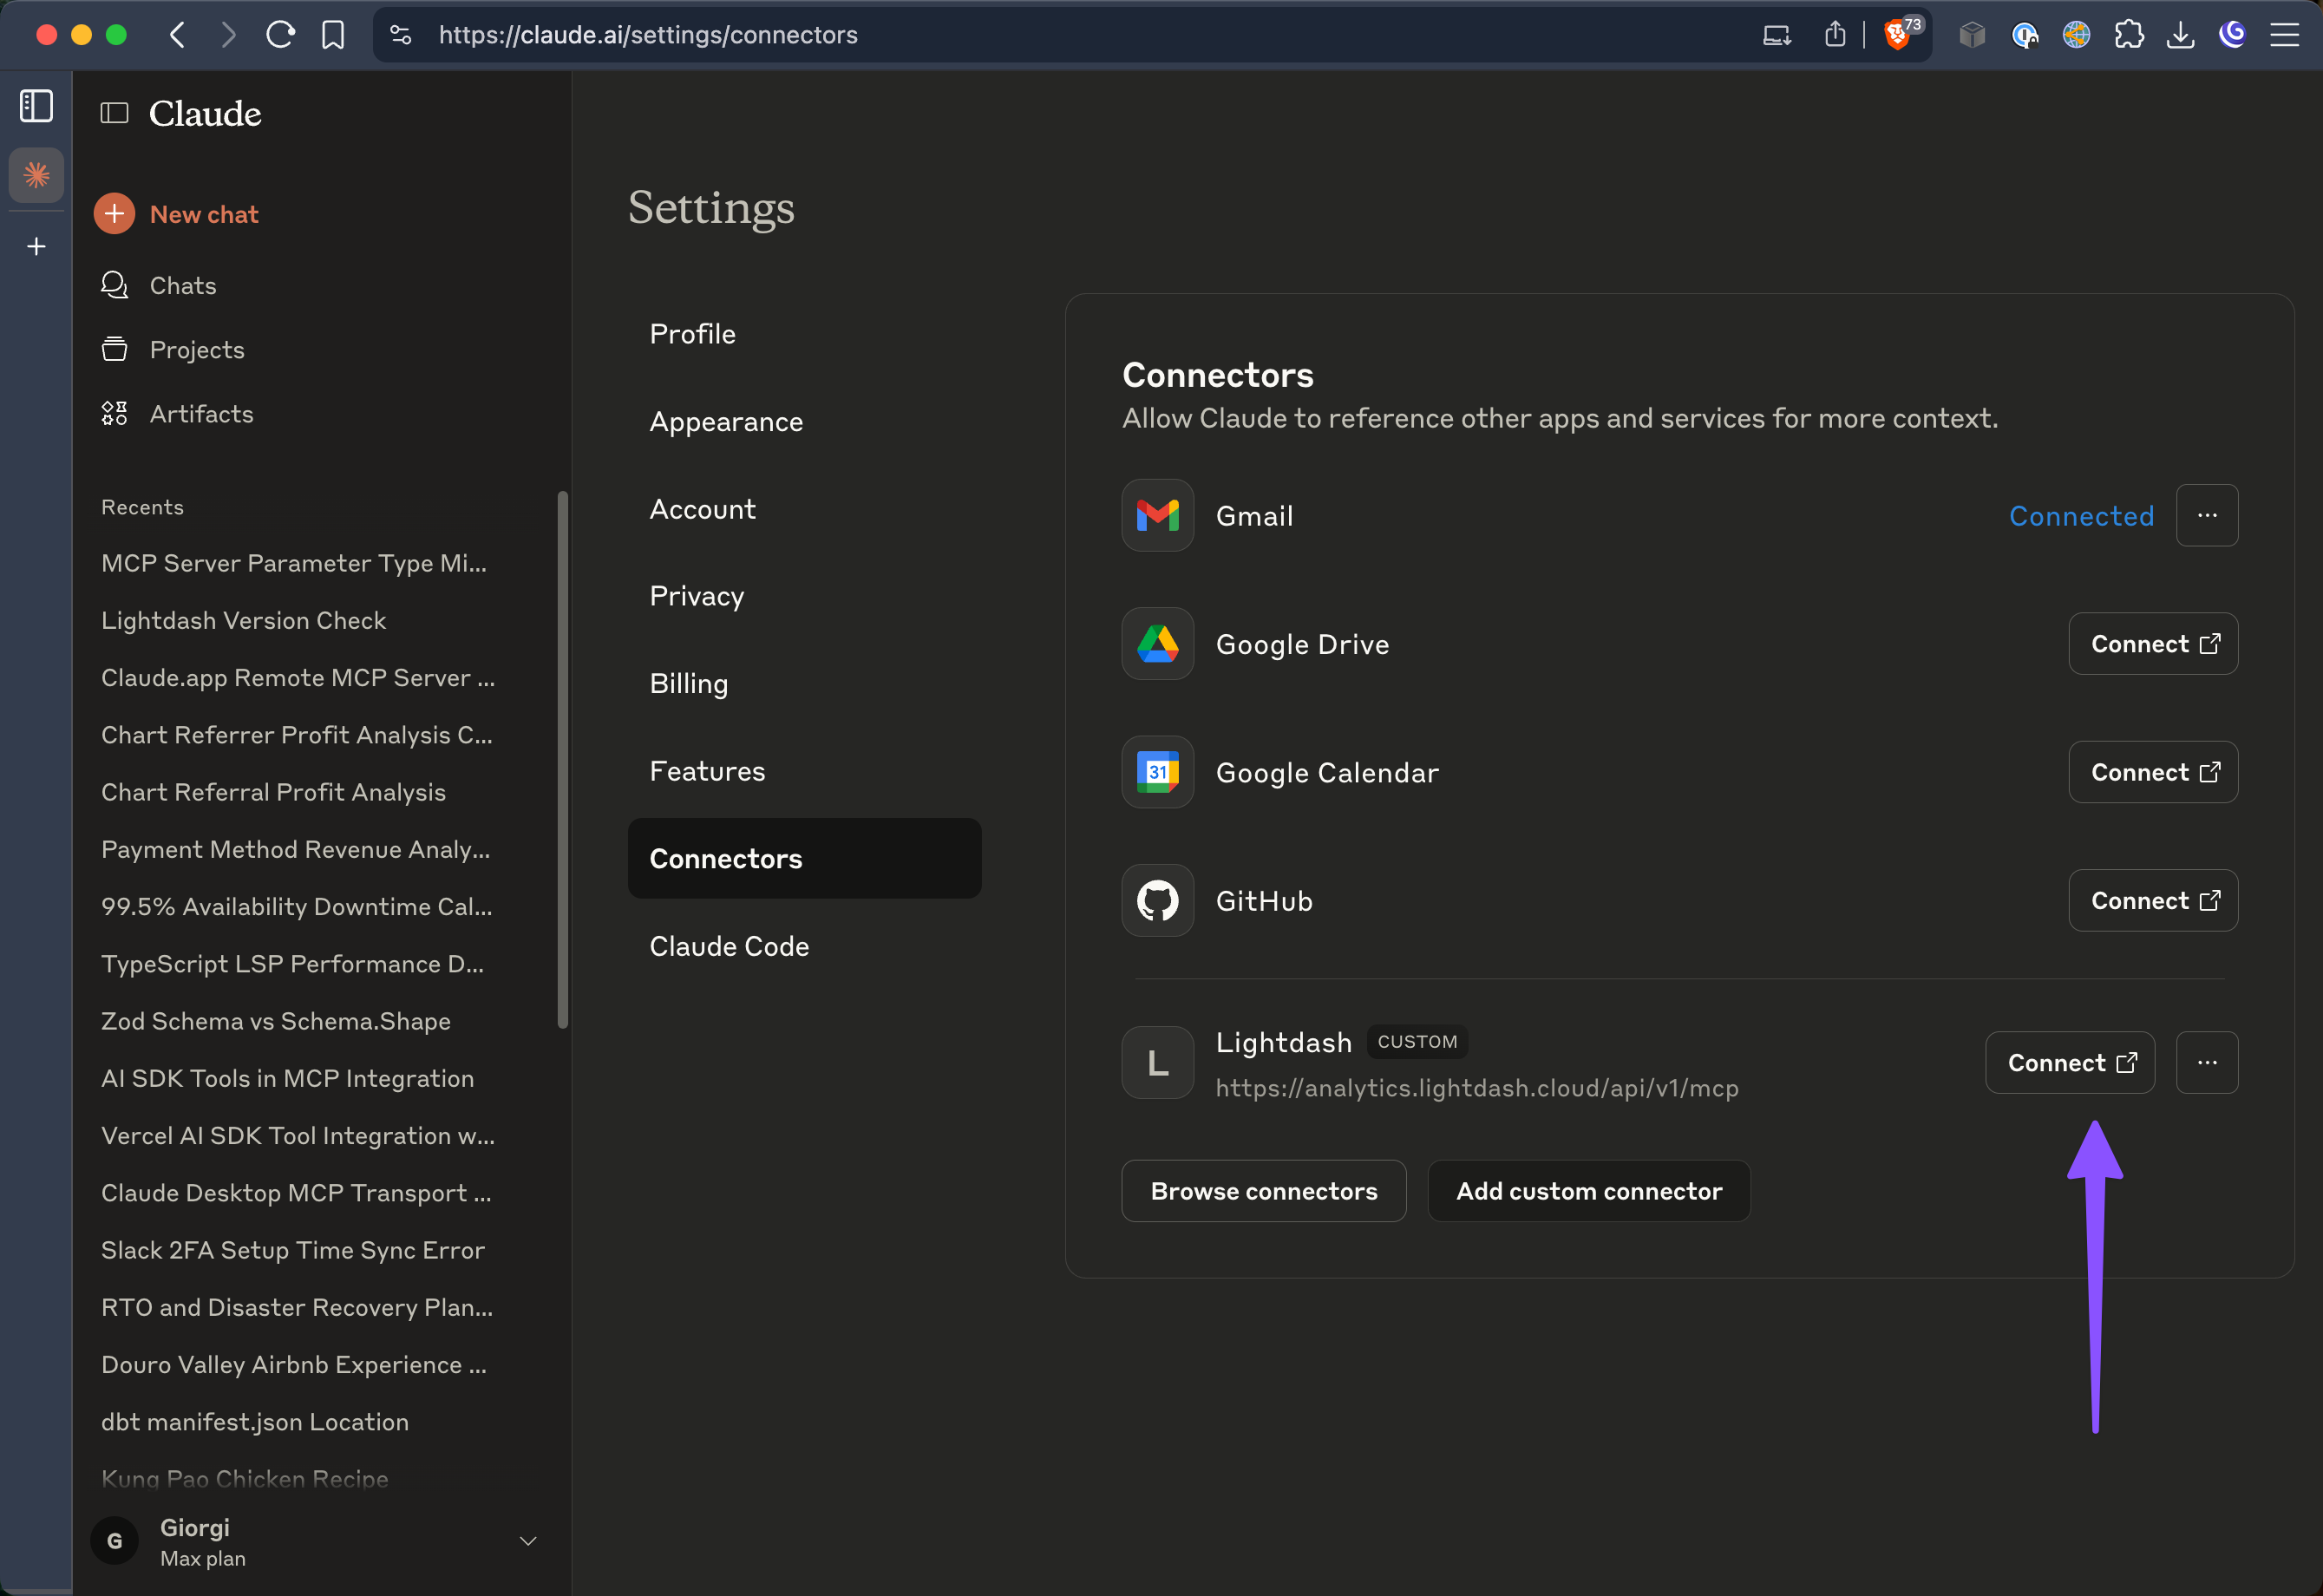
Connect and Authenticate
Click the “Connect” button to initiate the authentication process.
-
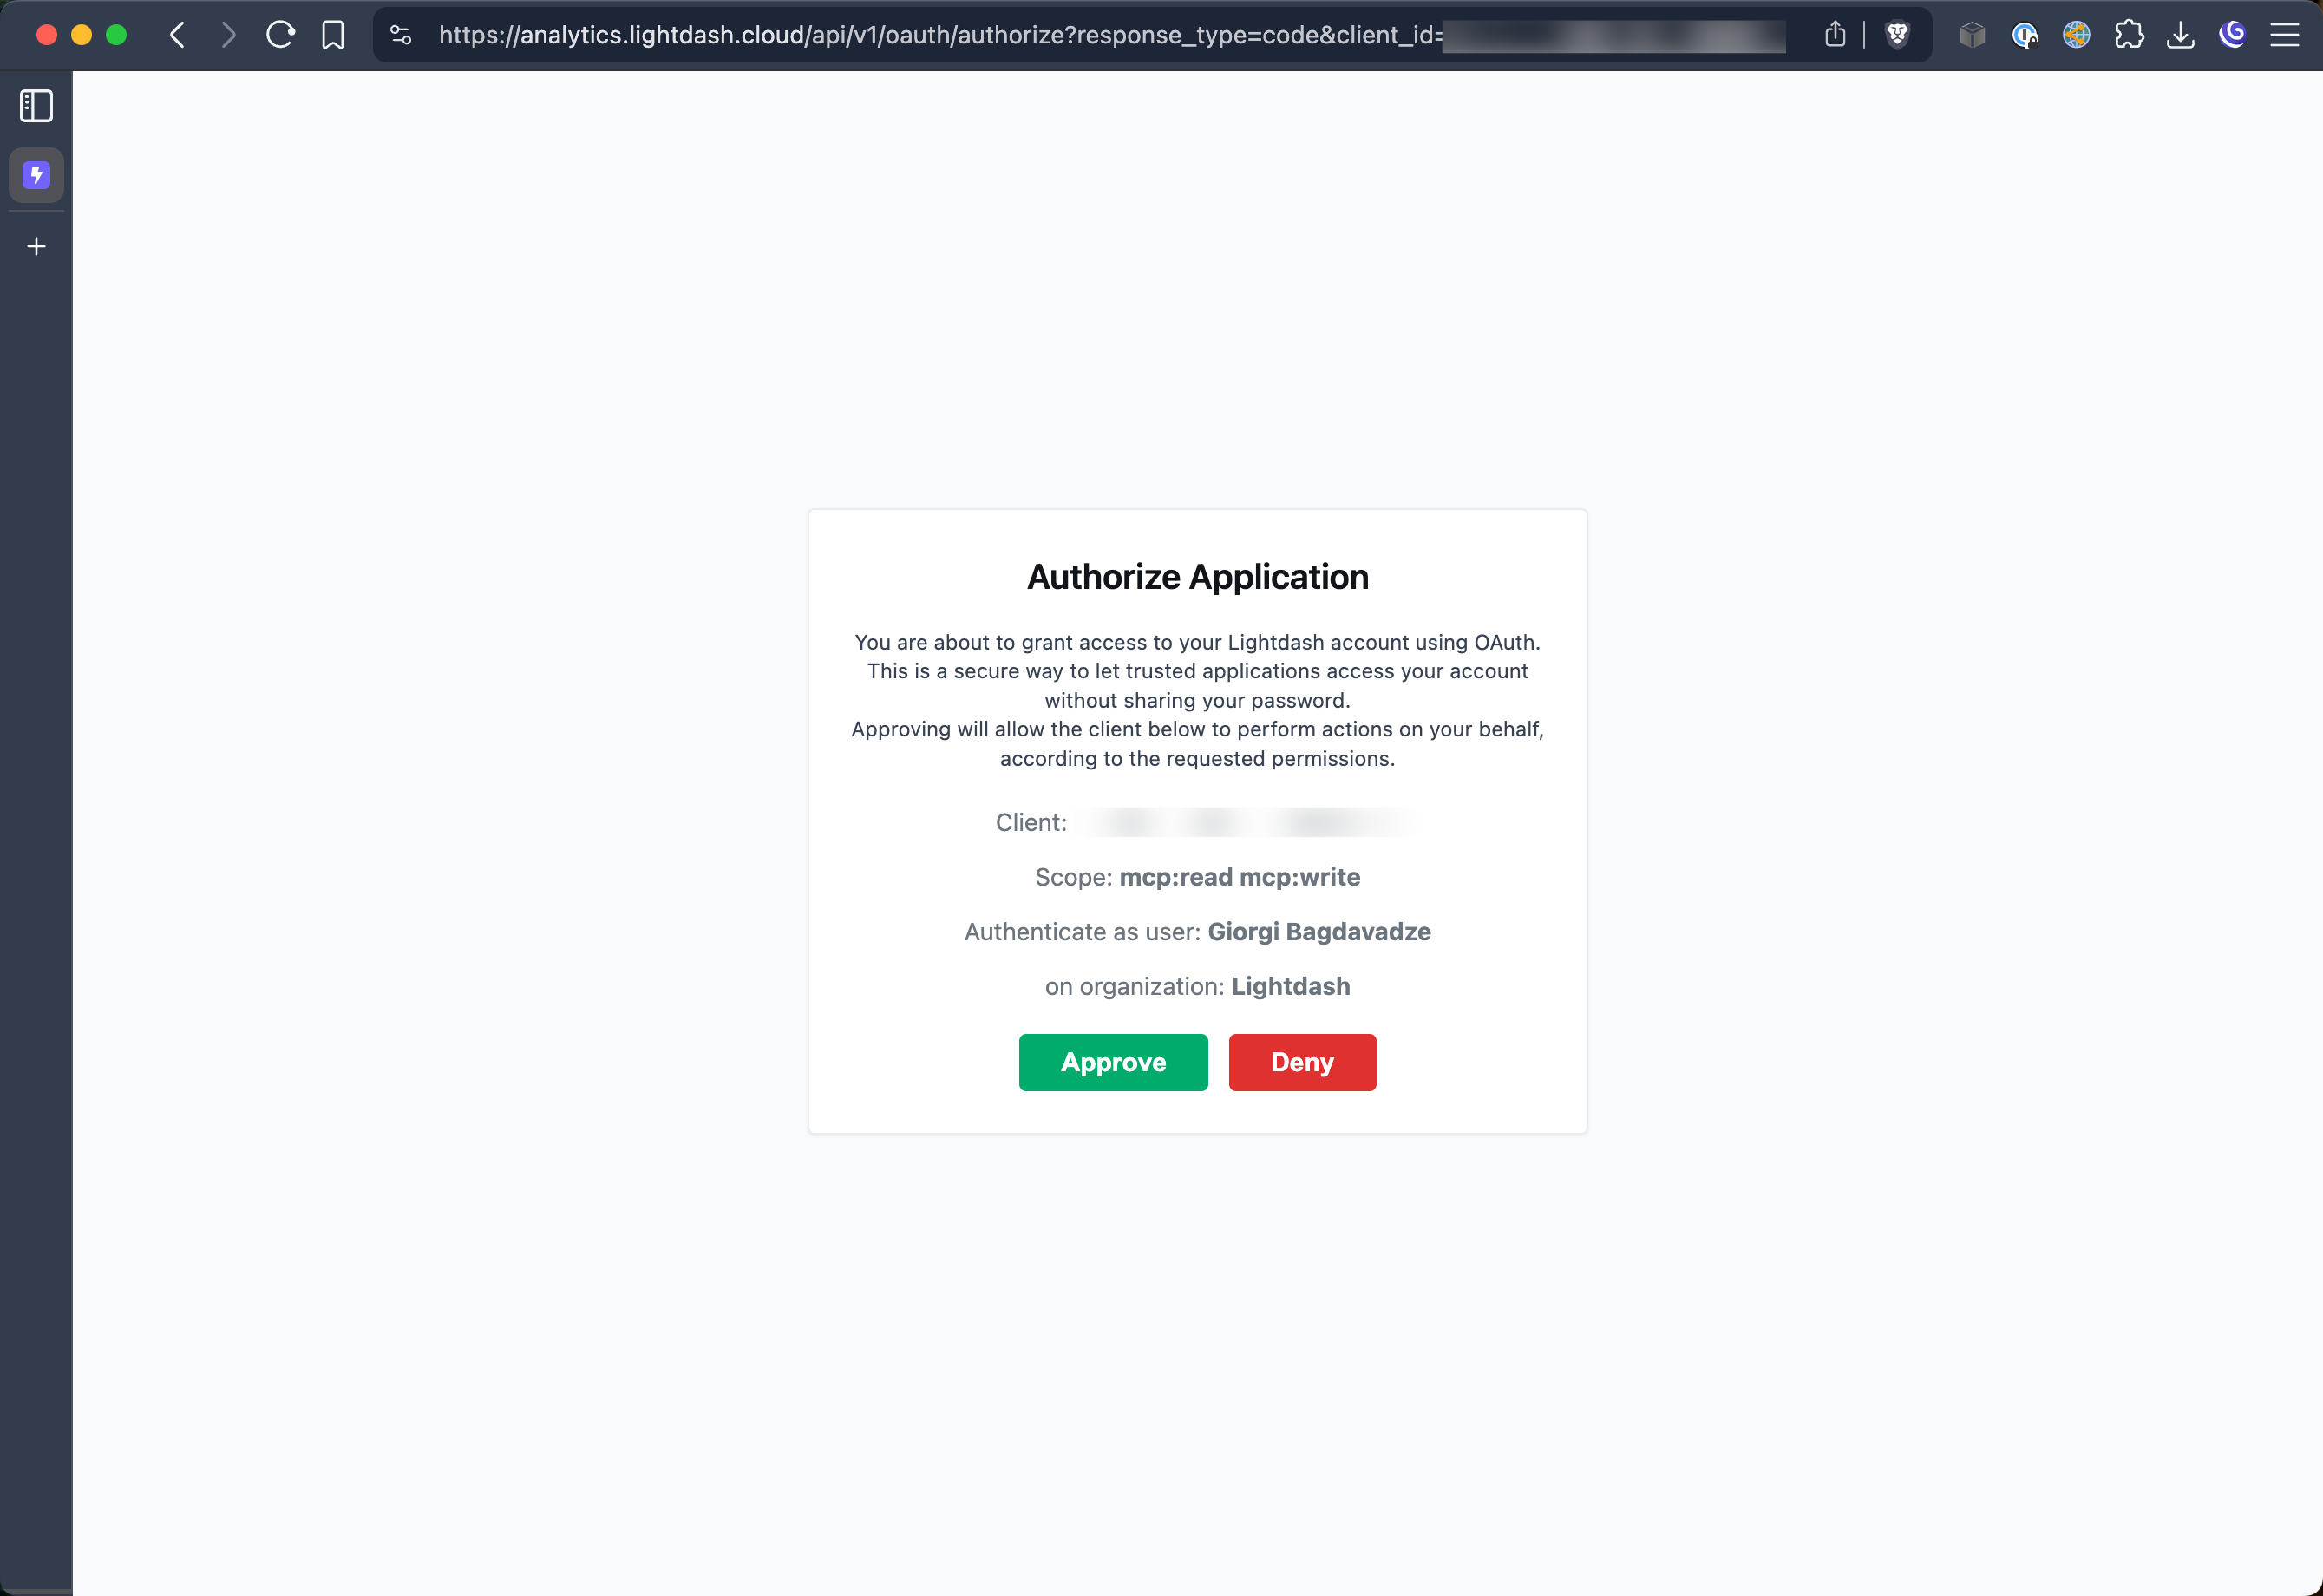
Complete OAuth Flow
Log in to your Lightdash account and approve the connection when prompted.
-
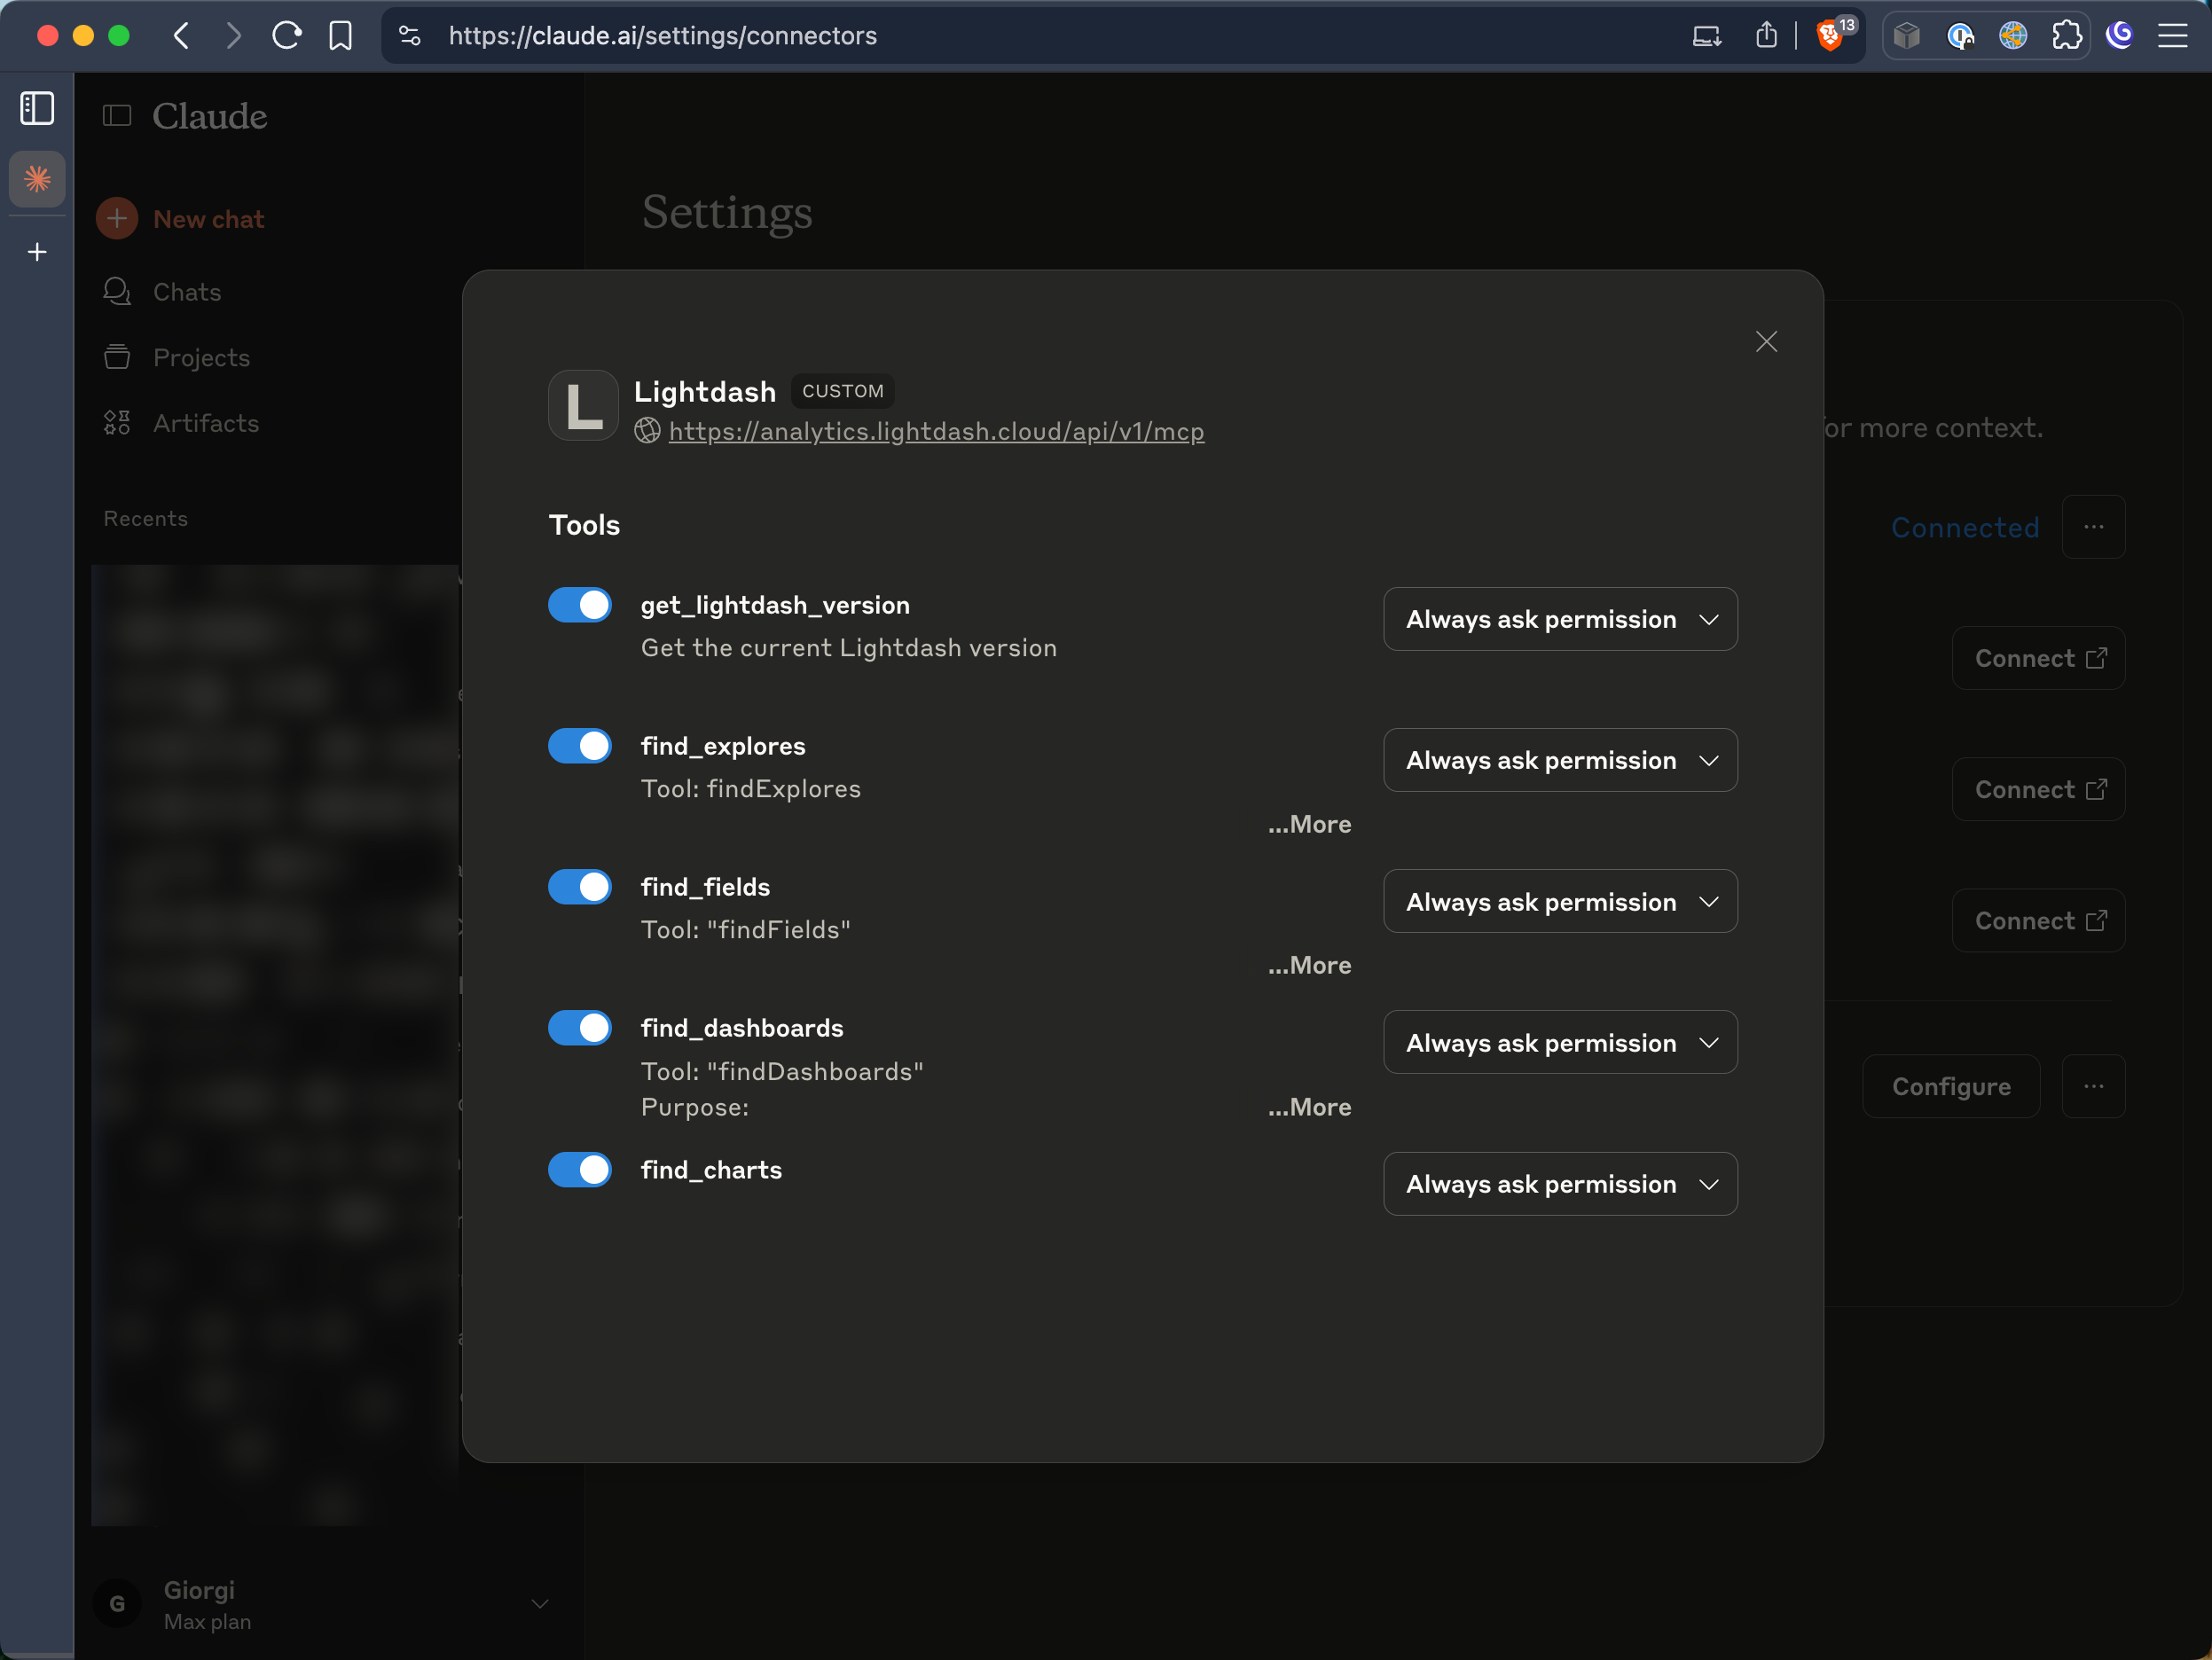
Configure Permissions (Optional)
Optionally configure which MCP tools Claude can access and set any additional permissions.